How to Manually Upload and Edit Screenshots on the GL Strings Dashboard
On this page
The article will show users how to manually upload new screenshots or edit existing screenshots in GL Strings projects.
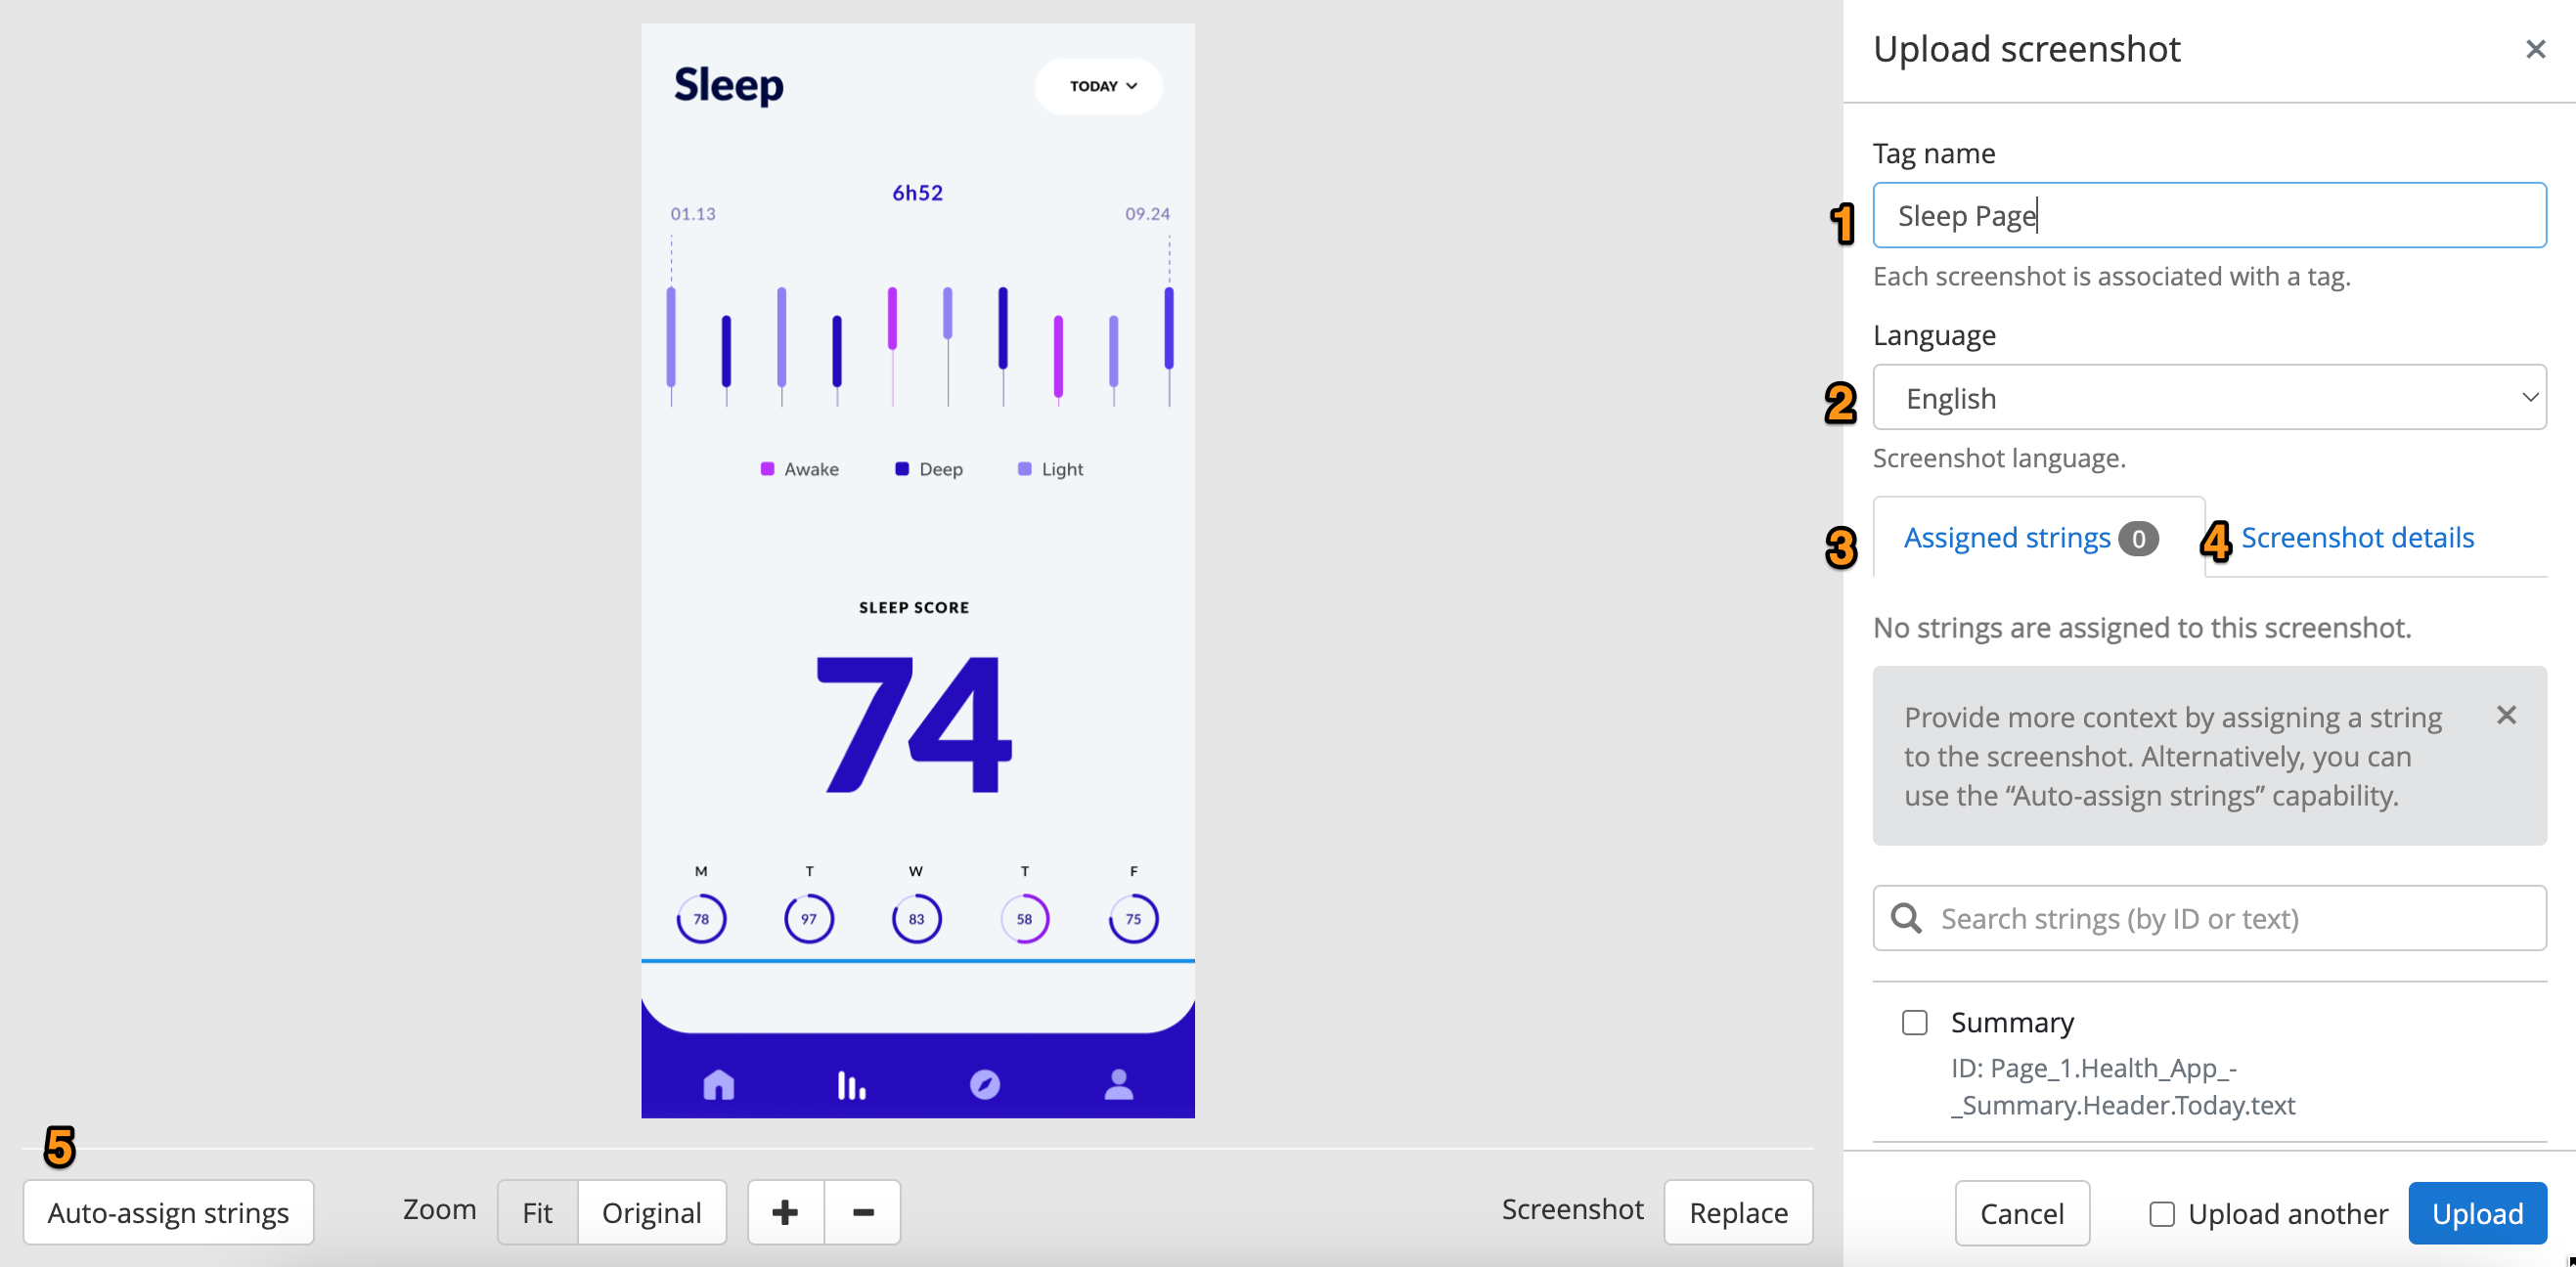
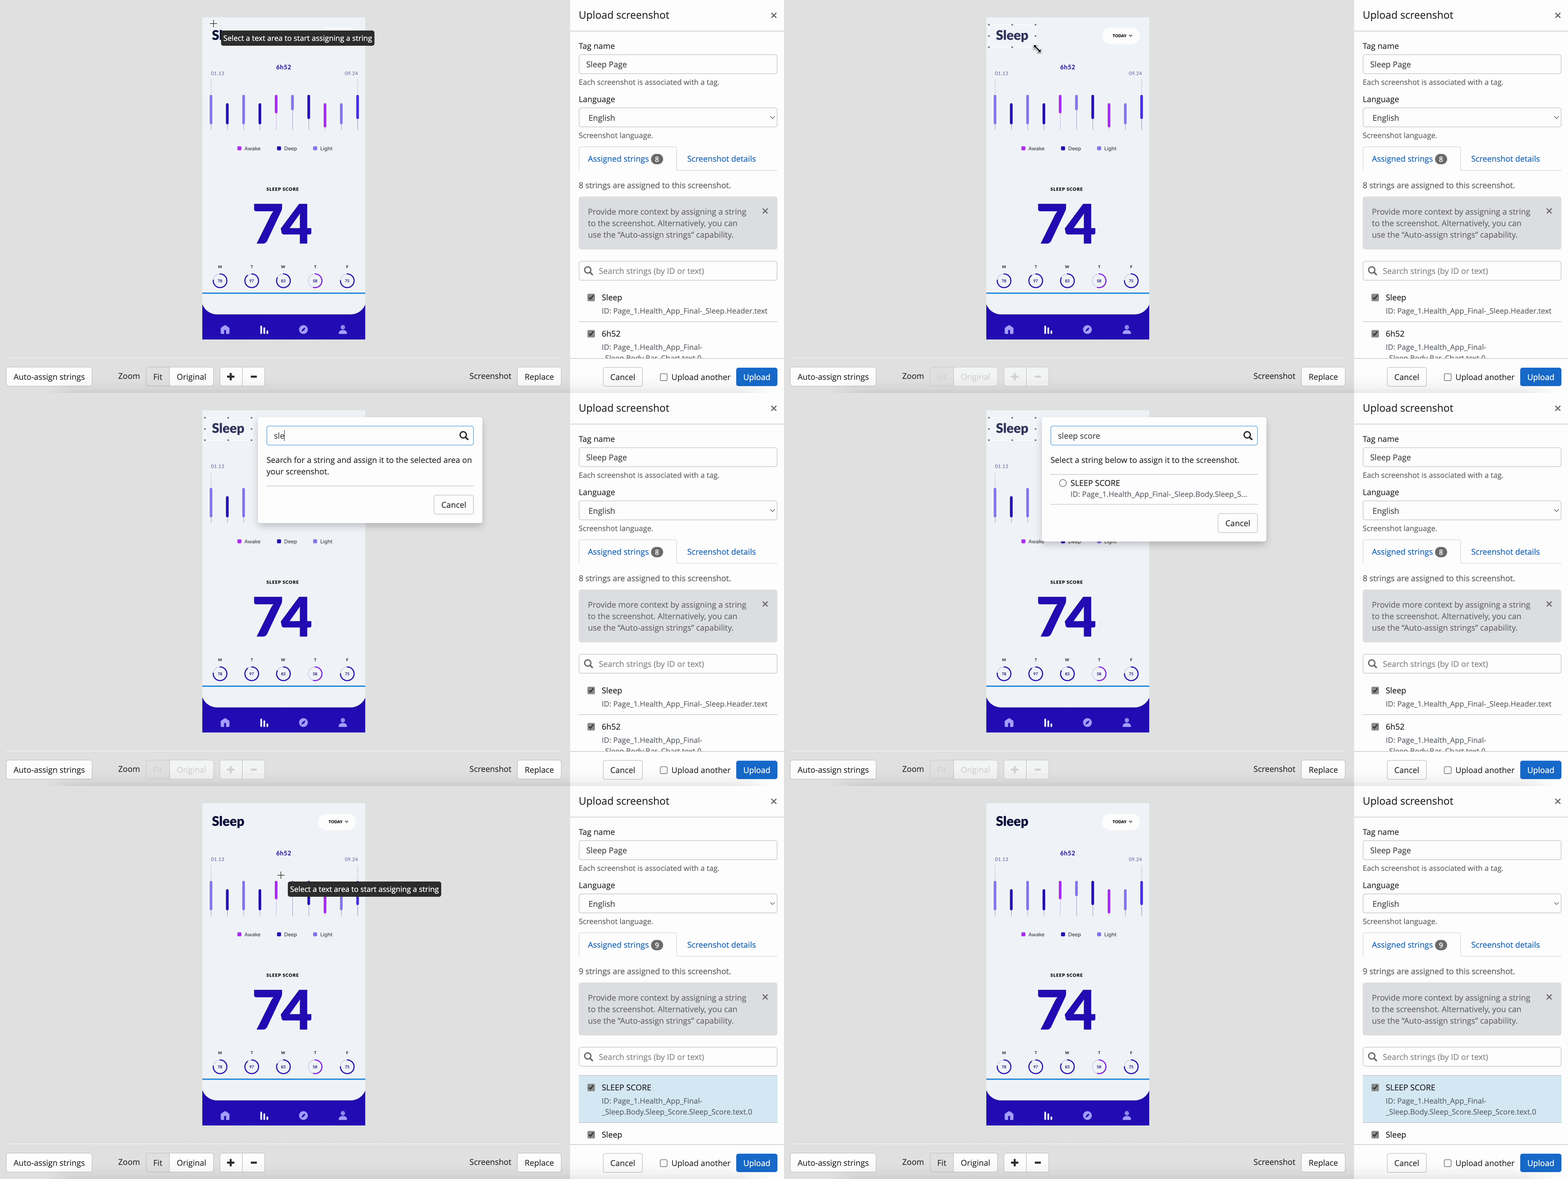
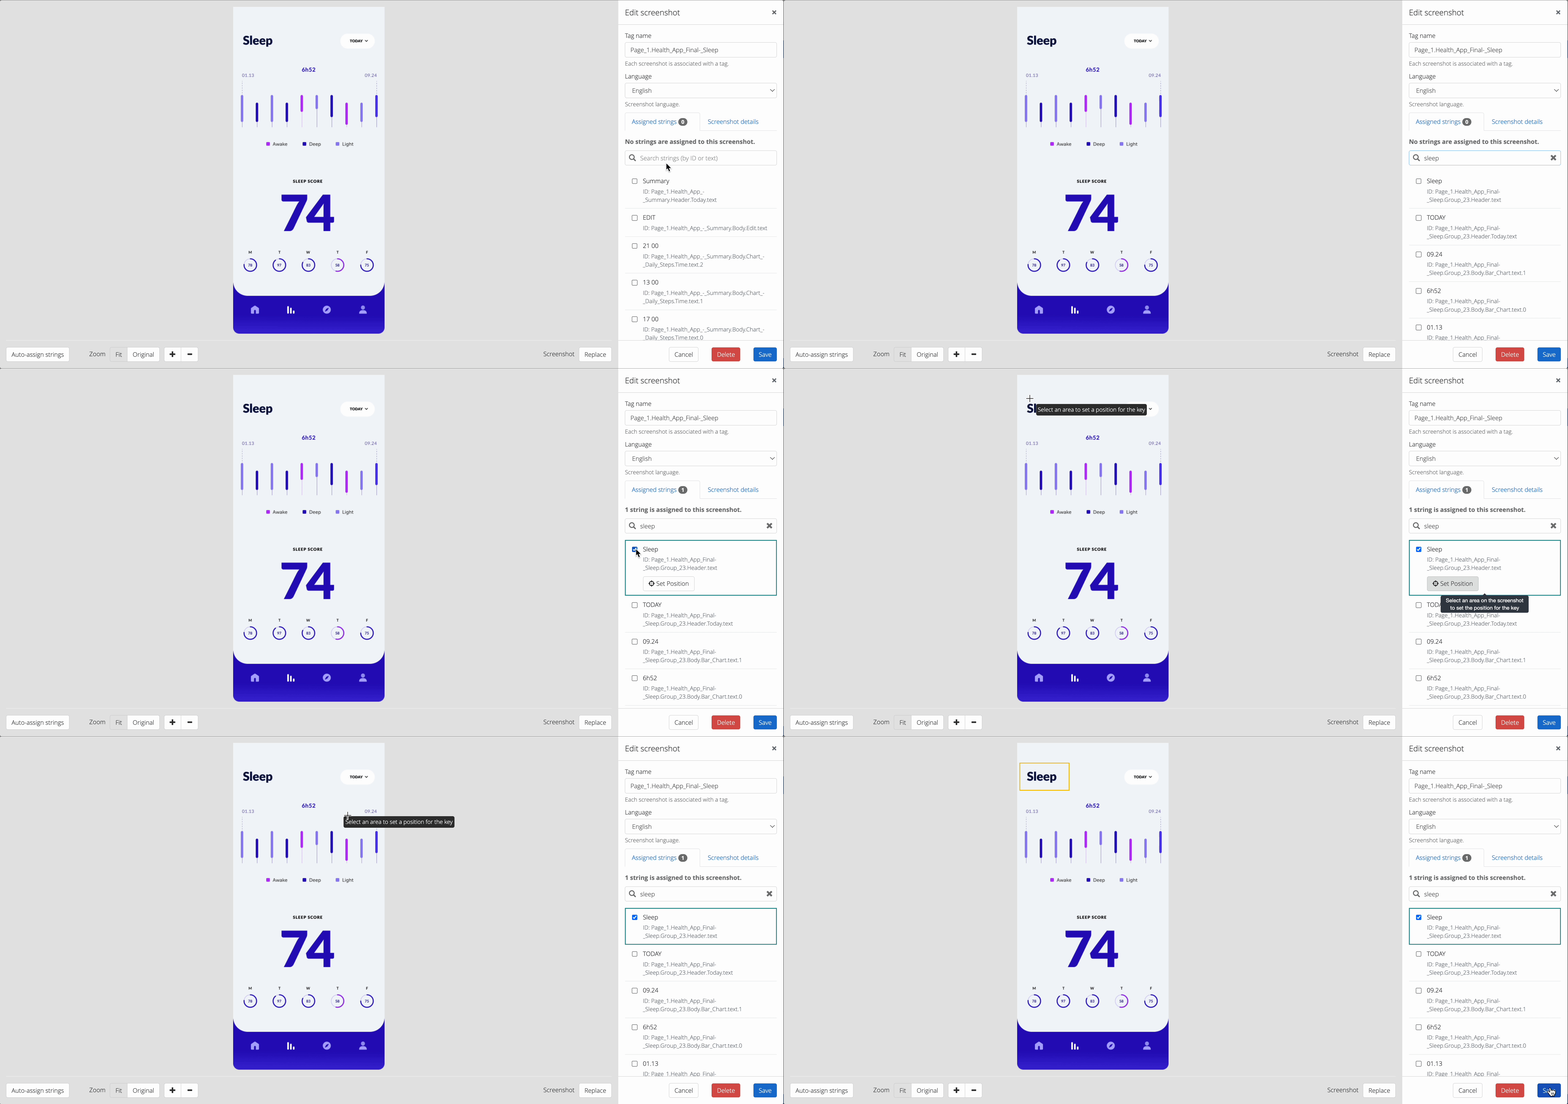
Users can open the Screenshot Editor to manually upload new or edit existing screenshots. With the screenshot Editor, users have the option to upload new screenshots or new variants of screenshots, add or remove the strings tagged to each screen, and set the string position on a screen. Each option ensures more accurate screenshots and context for linguists.
How to Open the Screenshot Editor
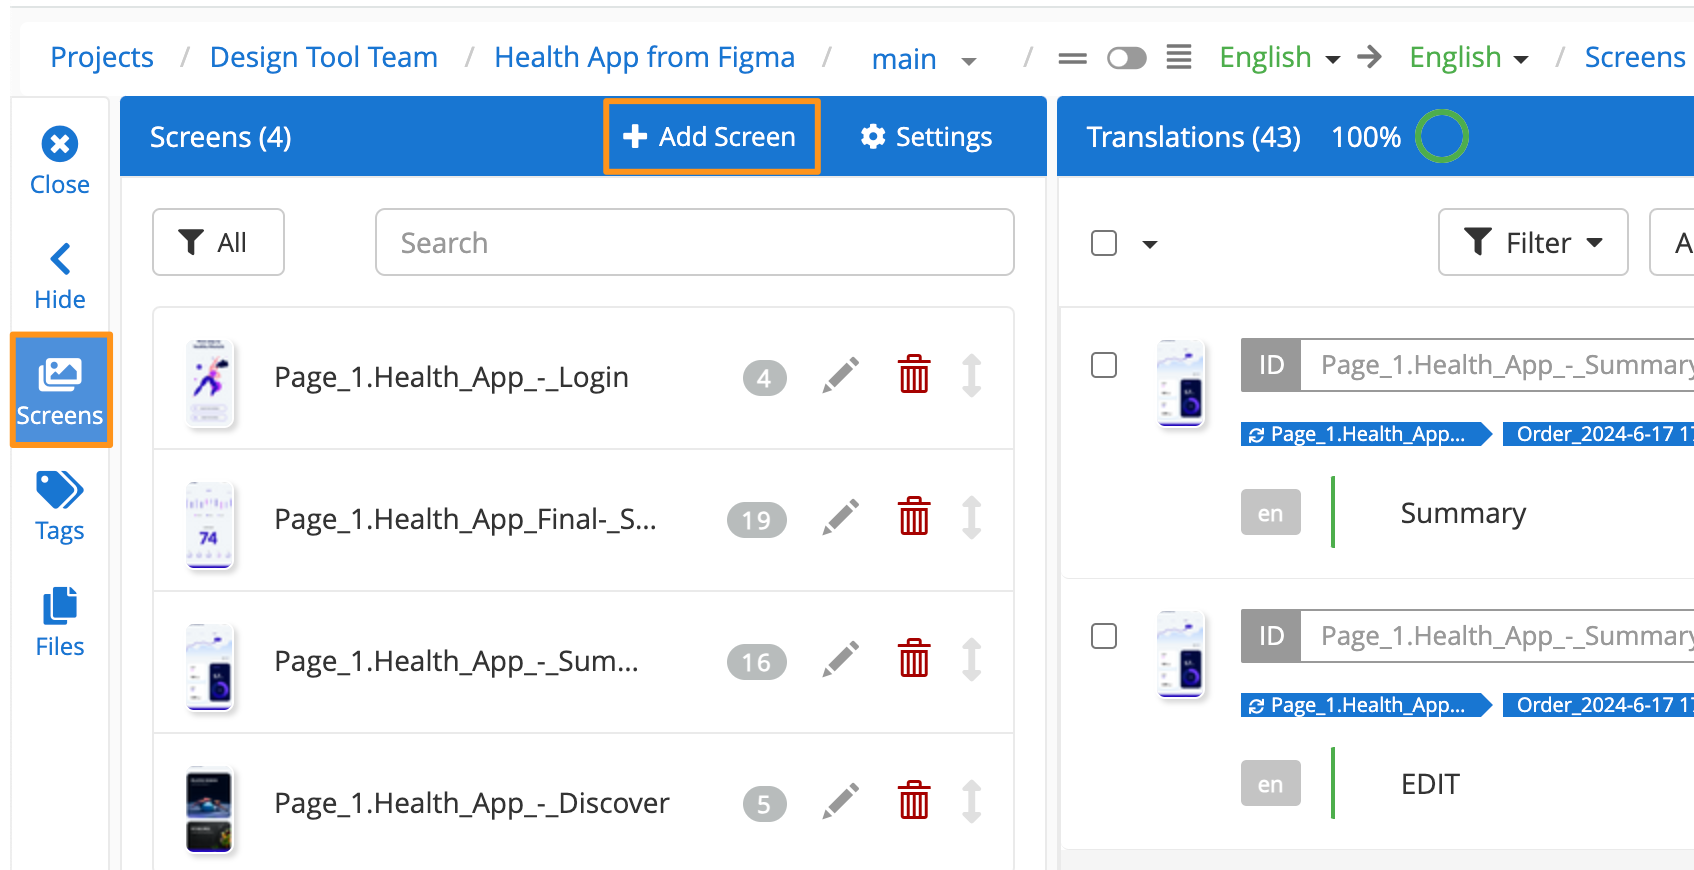
To upload a new screenshot, open the screens list and click +Add Screen (then drag and drop the screenshot to upload or browse files to select the screenshot for upload)
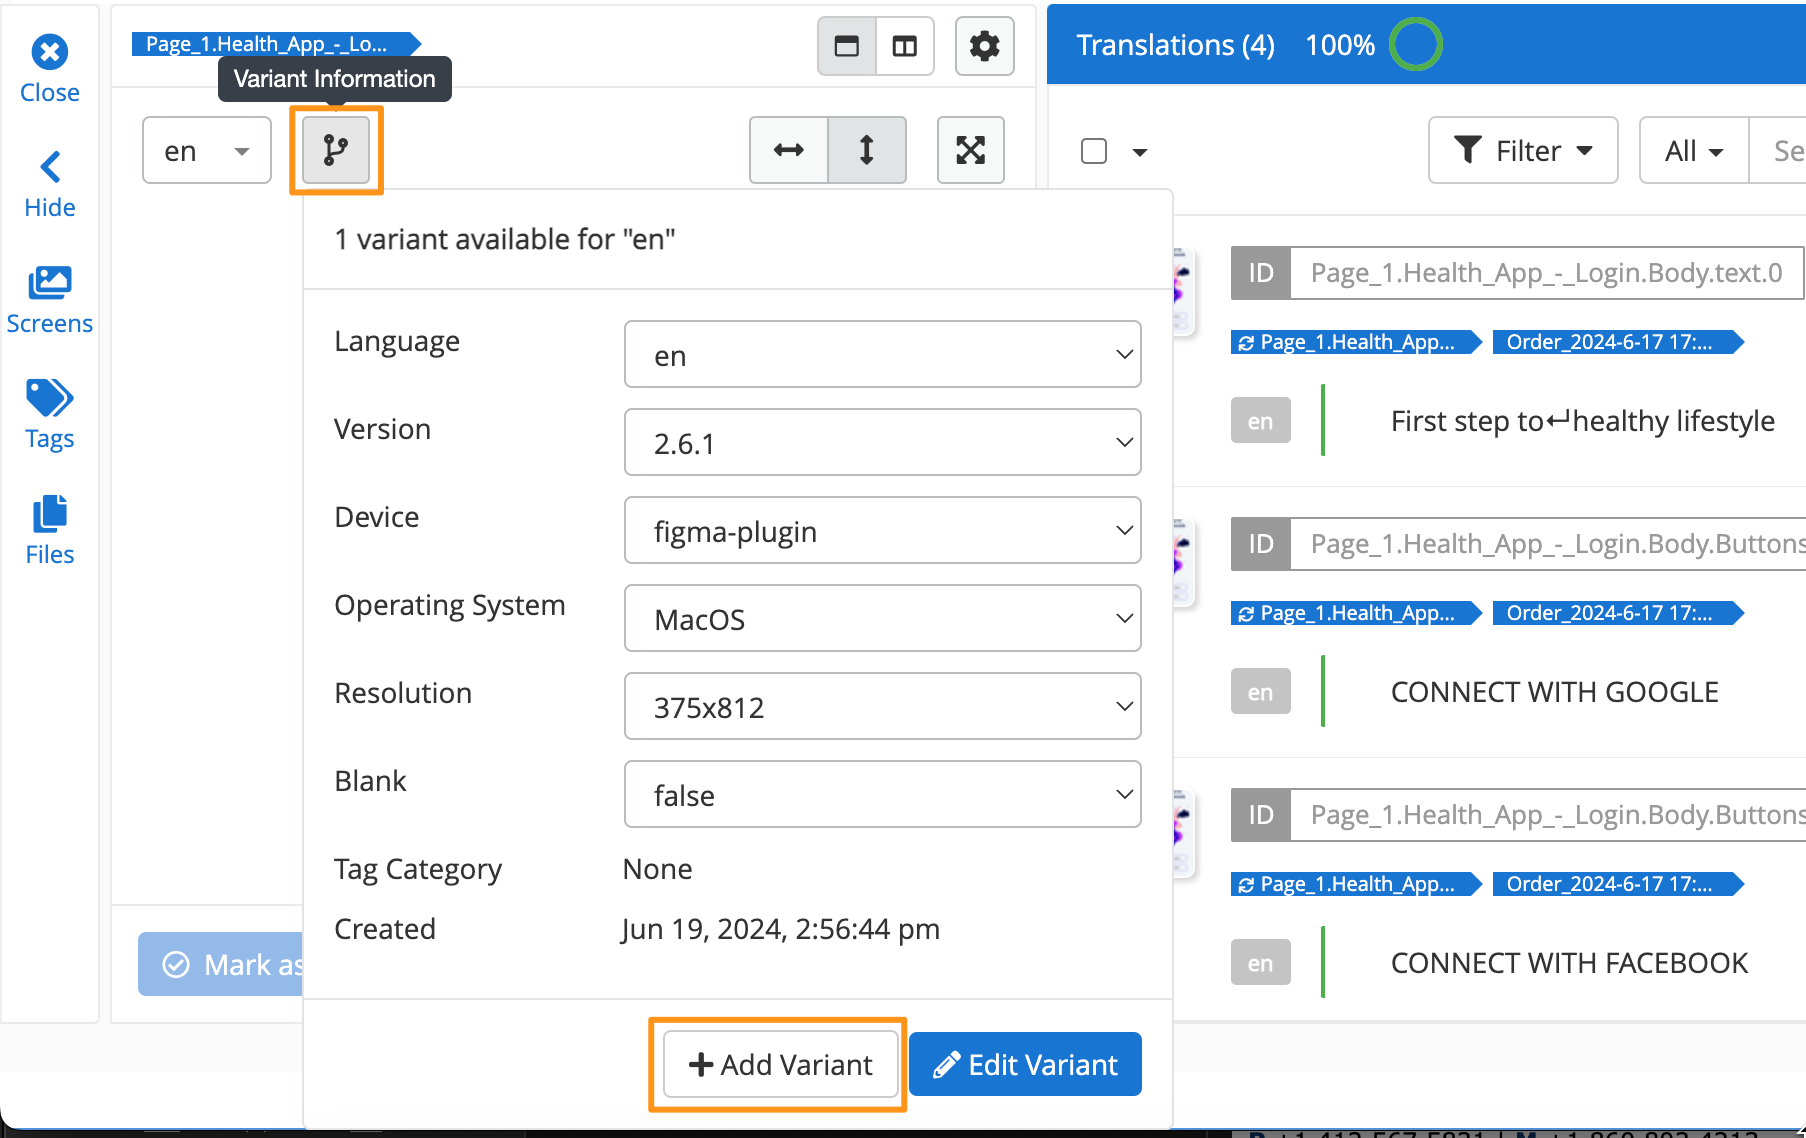
To upload a new variant for a specific screen, navigate to the screenshot in the and click the variant icon then click +Upload Variant (then drag and drop the screenshot to upload or browse files to select the screenshot for upload)
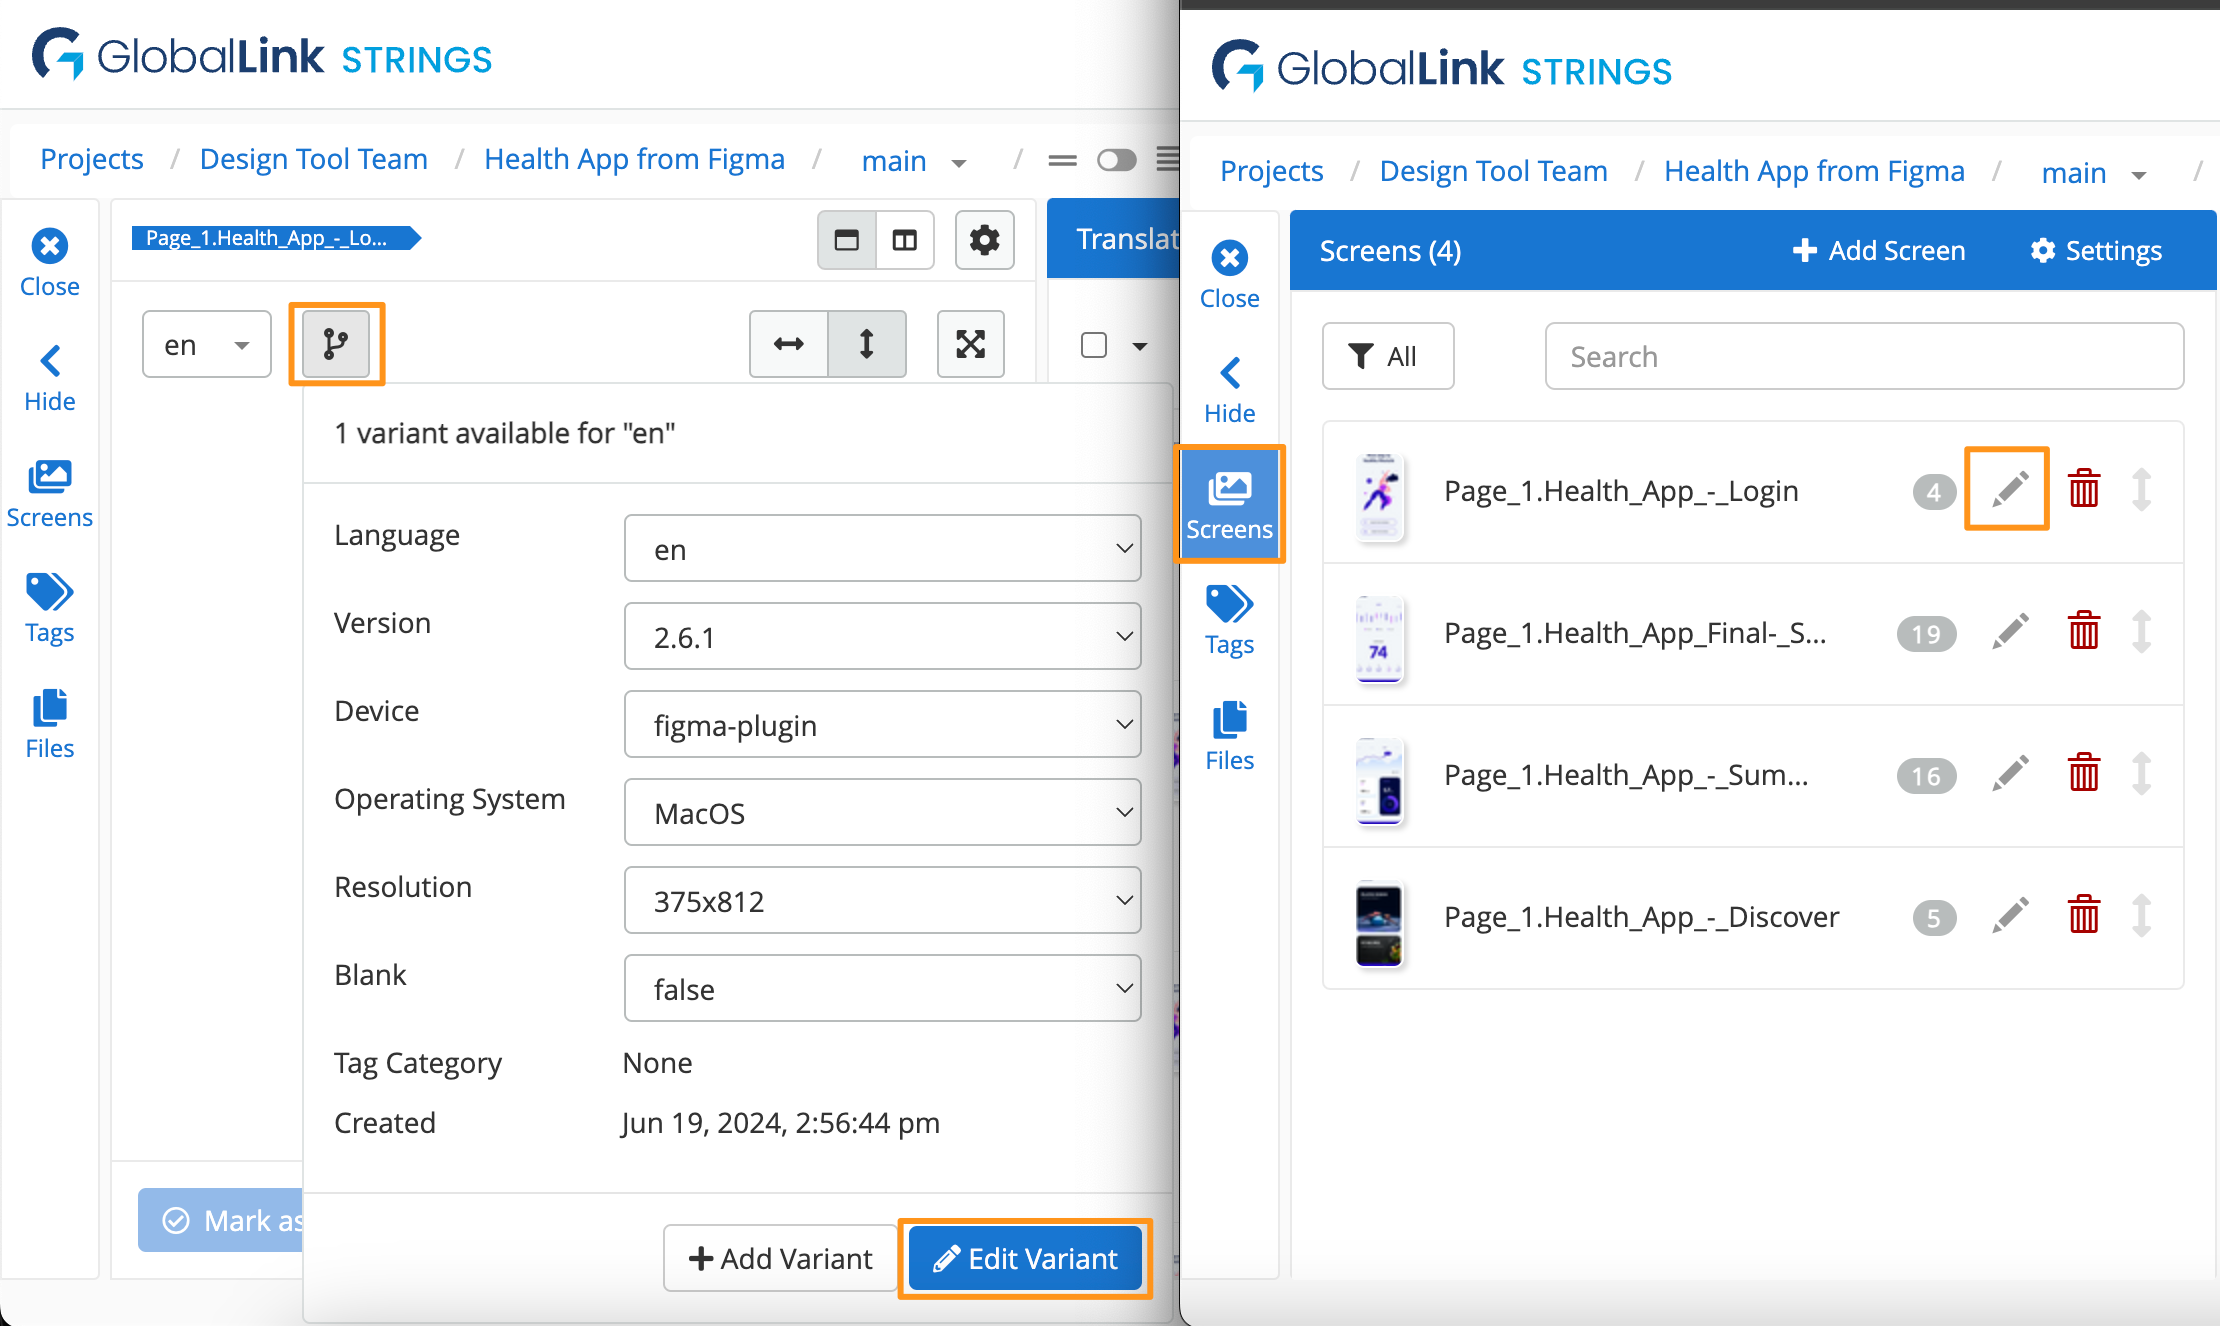
To edit an existing screen, open the screens list and click the pencil icon or navigate to the screen and click +Edit Variant
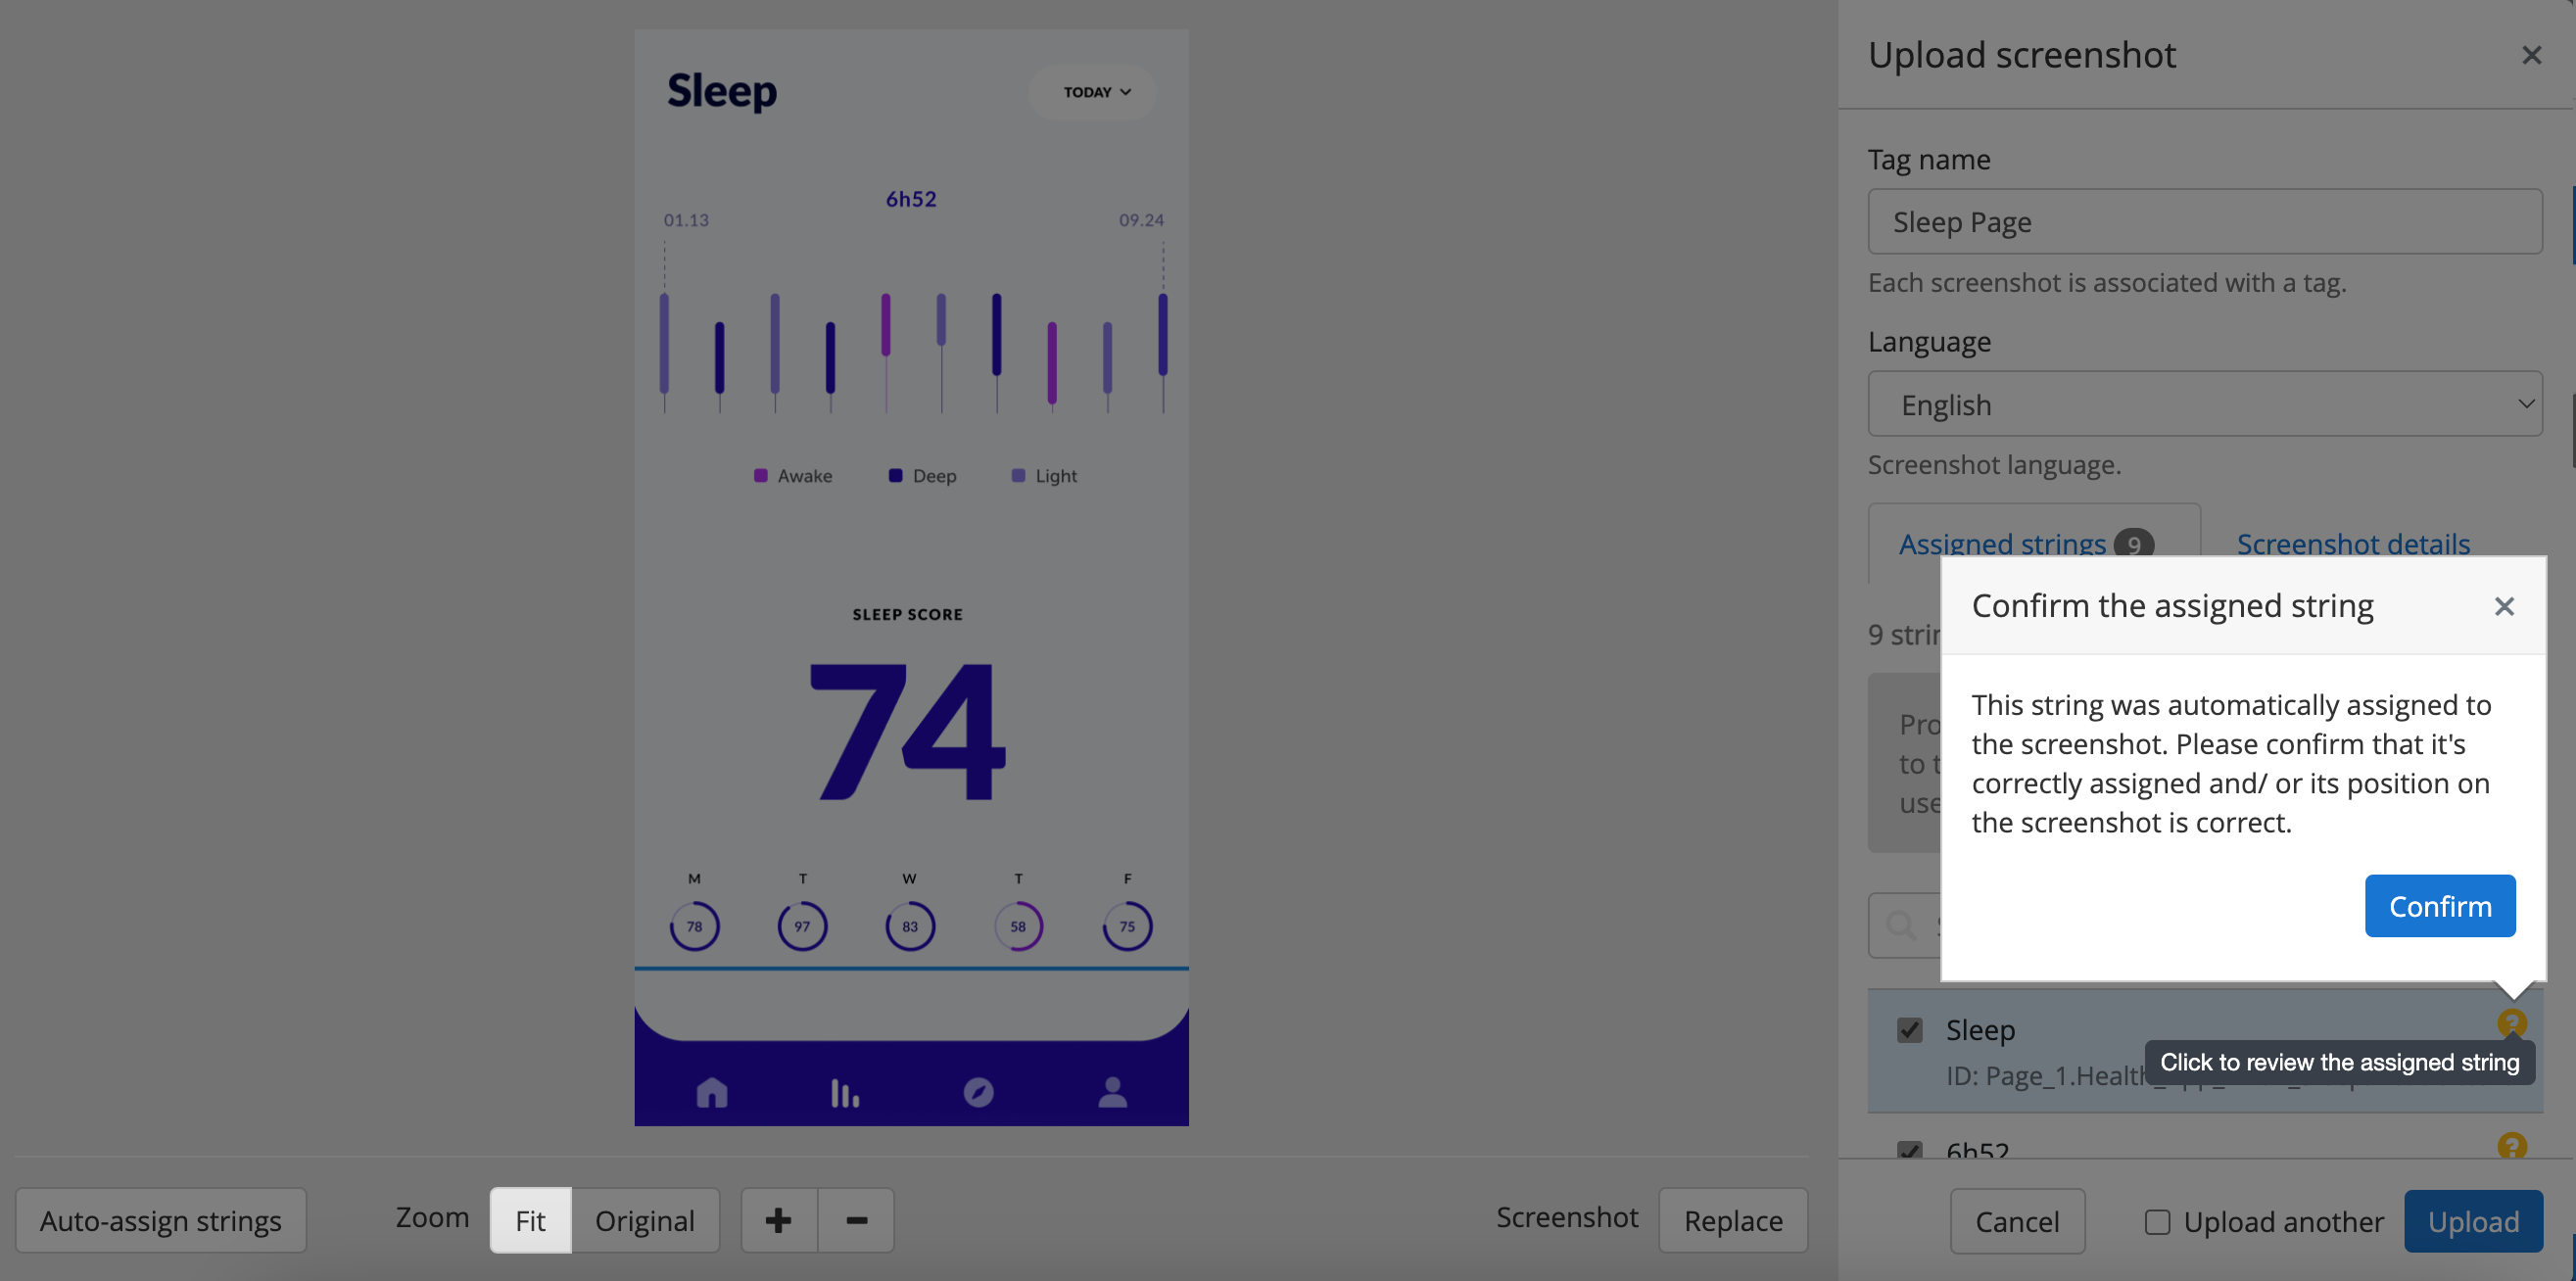
Auto-assign uses Optical Character Recognition (OCR) to tag or associate strings to a screen. OCR is not 100% accurate and users should review string associations. All auto-assigned strings are marked with a question mark '?' for easy identification.
**All strings marked with a '?' before starting the auto-assign process will be removed from the screen.
While the Screenshot Editor is open, click Auto-Assign Strings
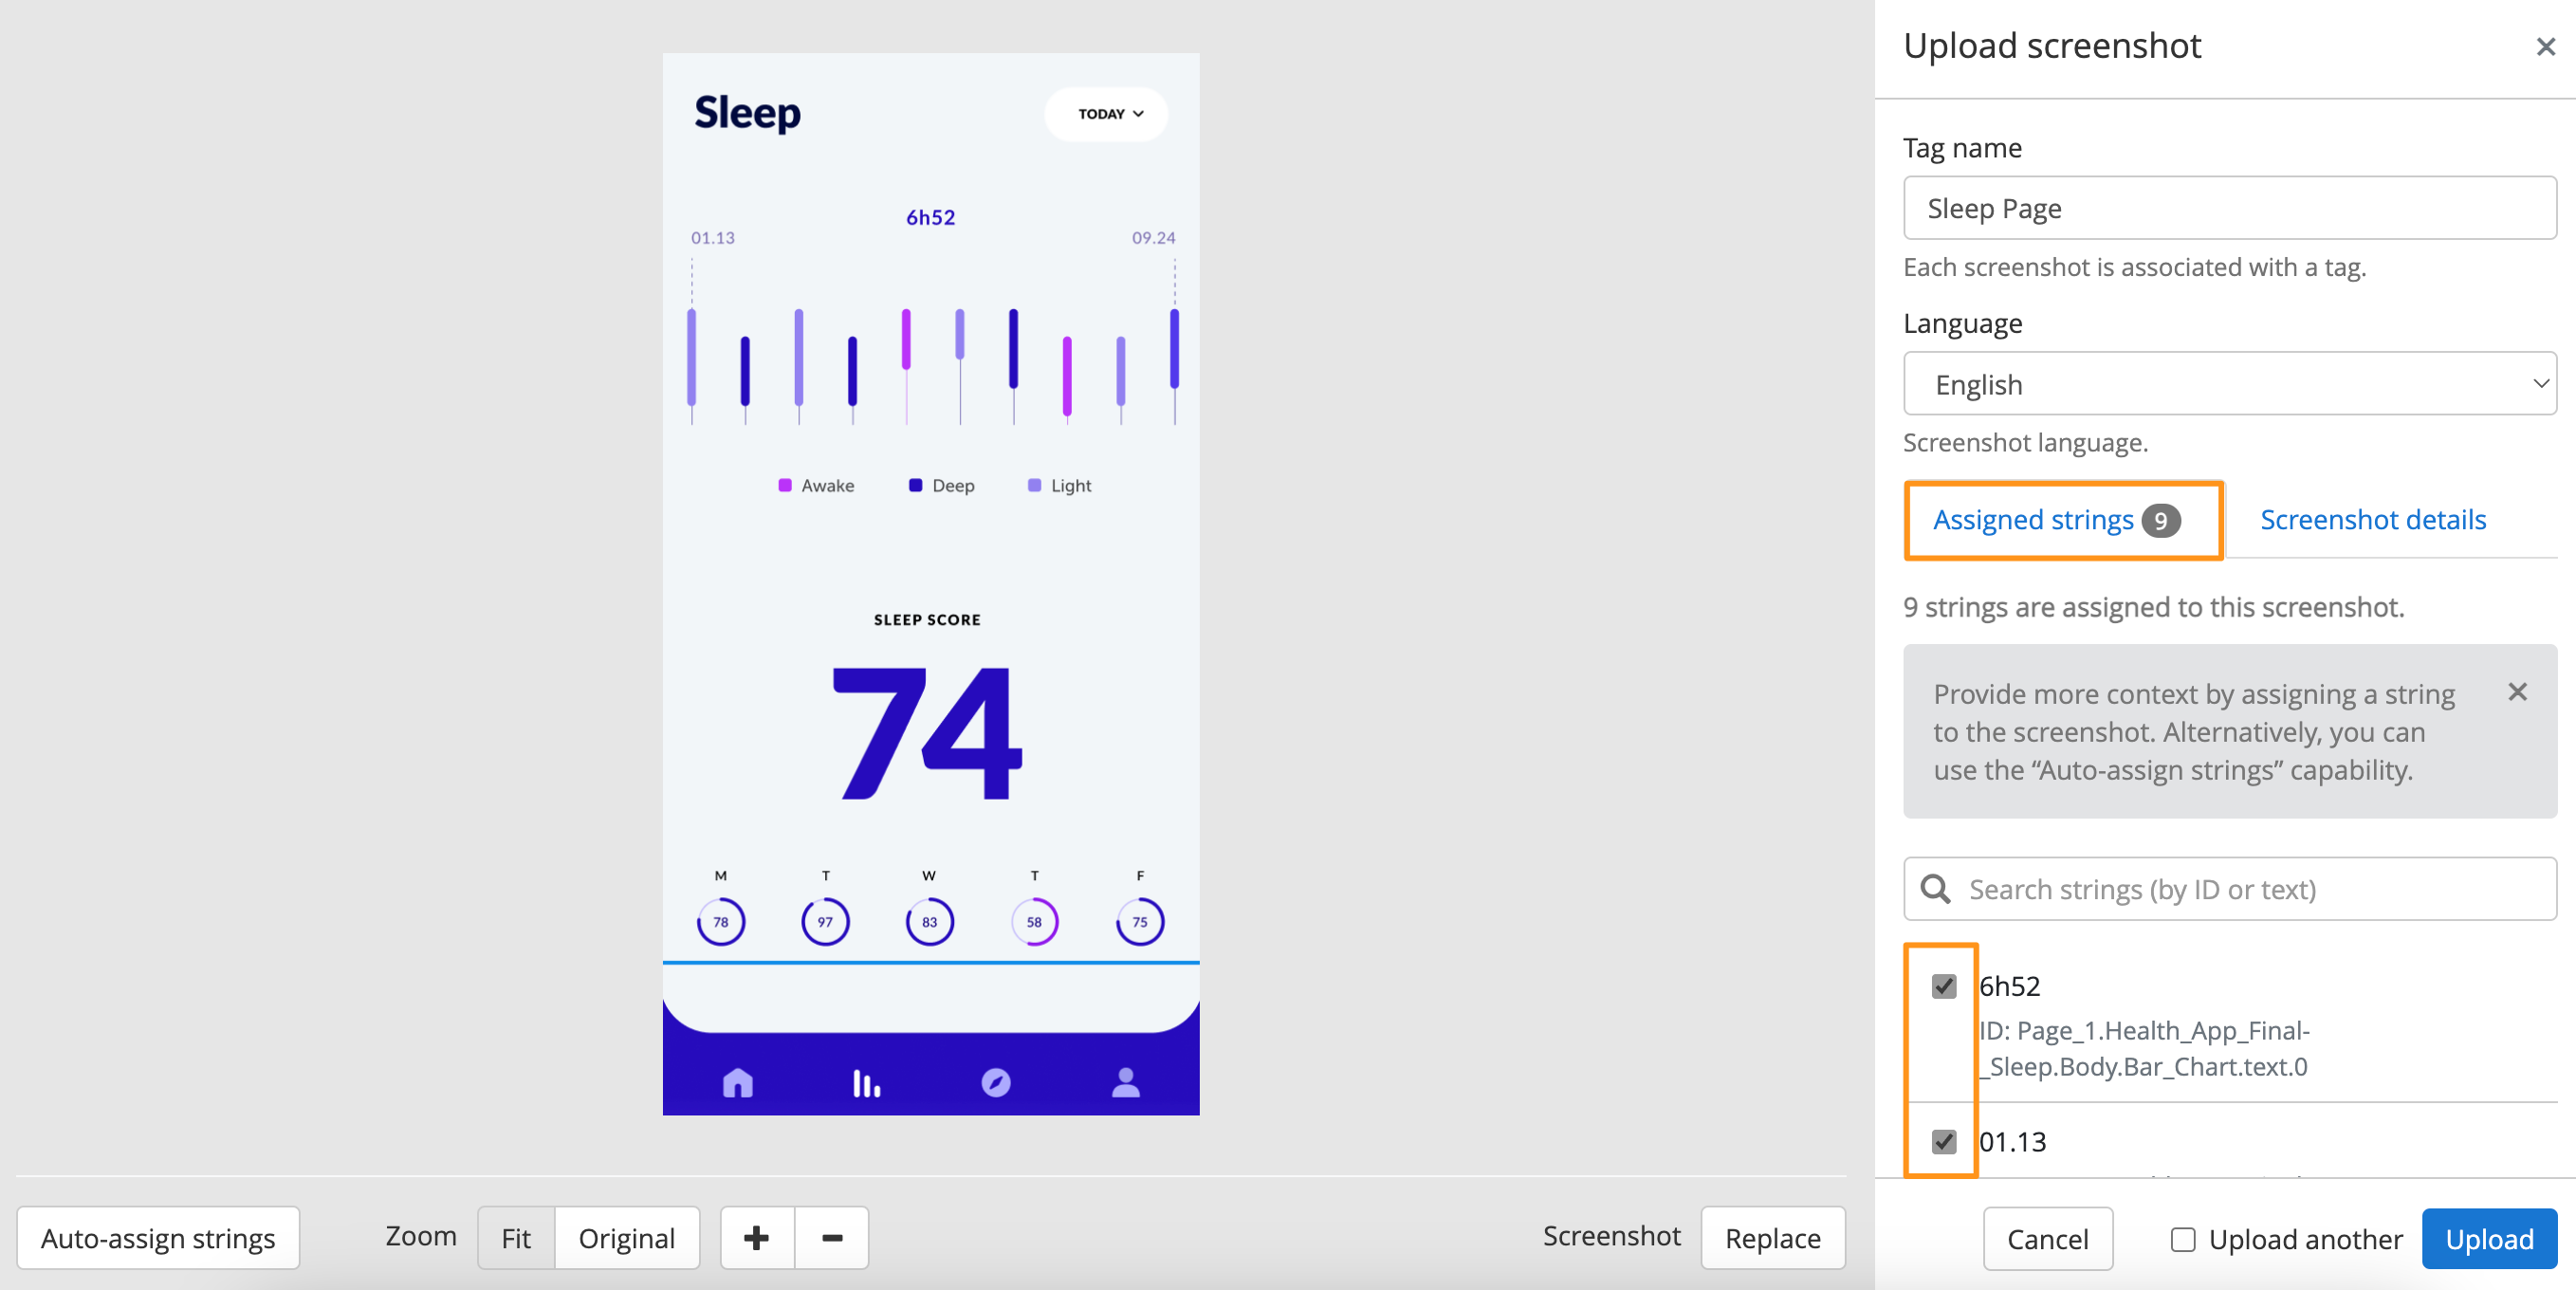
Confirm the Screenshot Language and mark the checkbox to confirm you are aware of the effects, then click Continue with Auto-Assign
In the Assigned Strings tab, review the auto-assigned strings designated with a question mark '?' for accuracy
Click the question mark '?' to confirm the assigned string